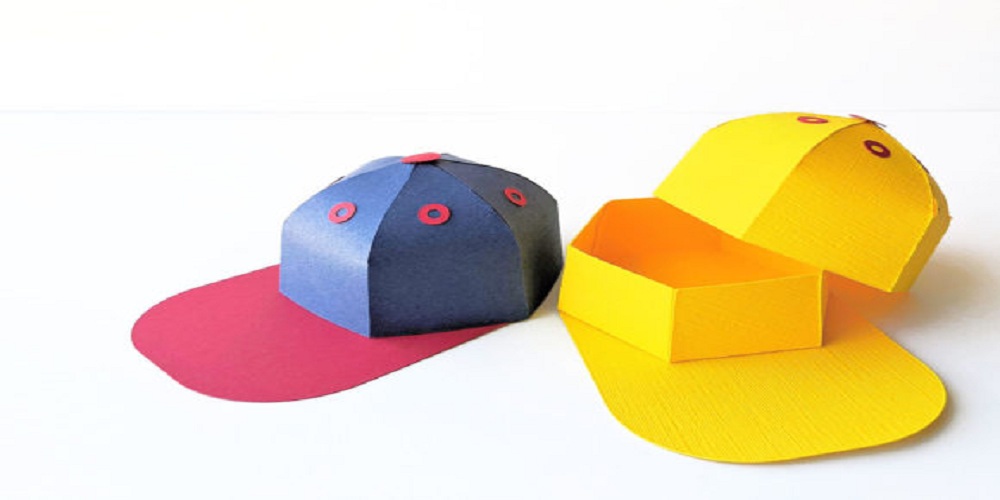
Baseball cap gift boxes are trending all over social media nowadays. This cap gift box is best for a birthday, Valentine’s Day, or as a father's day gift. A baseball cap gift box is an ideal gift for baseball lovers.
It is a considerate gift that can be customized to fit the receiver’s favorite sports team. You can use the top of this box for adding snacks, sweets, or anything you like.
This article will teach you how to make a baseball cap gift box with cardstock paper. Read the steps carefully to learn how to make a baseball cap gift box.
A Step-By-Step Guide To Making A Baseball Cap Gift Box:
The process of making a baseball cap gift box comprises three main steps:
- Formation of the top base
- Bottom base creation
- Crown formation
Before learning the steps for making a hat gift box, you have to arrange cardstock with a baseball template. If you have a machine for printing out these templates, then you have to download the baseball cap template pieces from any online site.
If you don't have a machine, don't worry; there is another easiest way to acquire these pieces without going out of the house.
You can order the template pieces from any online site. If you want to buy them according to your color scheme, then you have to send them your theme they will provide you according to your requirement.
Now that you have collected the cardstocks, it’s time to learn the steps for arranging these pieces into a baseball cap gift box.
Step#1: Formation Of Top Base:
First of all, organize the pieces accurately. You can use hot glue to organize these pieces. While using the hot glue, you must speed up; otherwise, the glue melts quickly, even before proper usage. Then you will not be able to line up the pieces accurately.
- For making the top base, you may require a hexagonal piece and 6 other card stocks to make the round shape of the cap.
- Fold the card stocks accurately.
- Apply the glue precisely to the bottom of each piece and attach them to the hexagon card stock to create a wall.
- After creating a wall with these pieces, fold them again inwards to attach them to each other. Now apply glue on them and hold for 2 seconds to make a proper crease.
- Now your top base of baseball cap box gift is ready.
Step#2: Bottom Base Creation:
- You will require three large-sized cardstock pieces to create a bottom base of the box.
- Apply glue stick on one piece, then put the other on it, flatten it, and do the same with the third cardstock.
- The bottom base formation is completed. Now it will look like an entire baseball cap when you put a top base on the bottom.
- Attach the top with the bottom by applying glue on the edges of it, and place it slowly.
Step#3: Crown Formation:
- For making a crown, take 6 cardstock pieces with cuttings and edges that look like sharp teeth.
- Attach them by applying glue on the first 7 edges of the cardstock.
- When you attach all 6 pieces, they will look like windmills.
- Now it is time to give them a crown shape by folding the sharp teeth and attaching them with the glue.
- Now put a button on the center of the crown.
- Your baseball cap gift box is ready now.
Conclusion:
If you want to make a beautiful baseball cap gift box, follow these steps. You can put anything in the box for gifting it to your loved ones.


